
A hidden zipper gives a quilted pillow a clean finish and makes the cover easy to remove. A simple fabric flap covers the zipper across the back, and it’s a nice place to add a little contrast, too.
I’m using my Pinery pillow from the Pinery Pattern in this tutorial, but you can use this method with other quilted pillow tops.
What You’ll Need
A quilted pillow front, trimmed and ready to finish
Backing fabric, cut 2 inches larger than the pillow front in both width and height
One flap strip, 4 inches wide and the same length as the width of the backing
One zipper a few inches longer than the width of the backing
Coordinating thread and a zipper foot
Sewing clips or pins
A rotary cutter, ruler, cutting mat, and iron
A pillow insert
Why Add a Flap?
The flap hides the zipper and gives the back a neat, finished look. Use matching fabric for a subtle finish, or choose a contrasting fabric like the black strip in my sample.
Step 1: Prepare the Backing
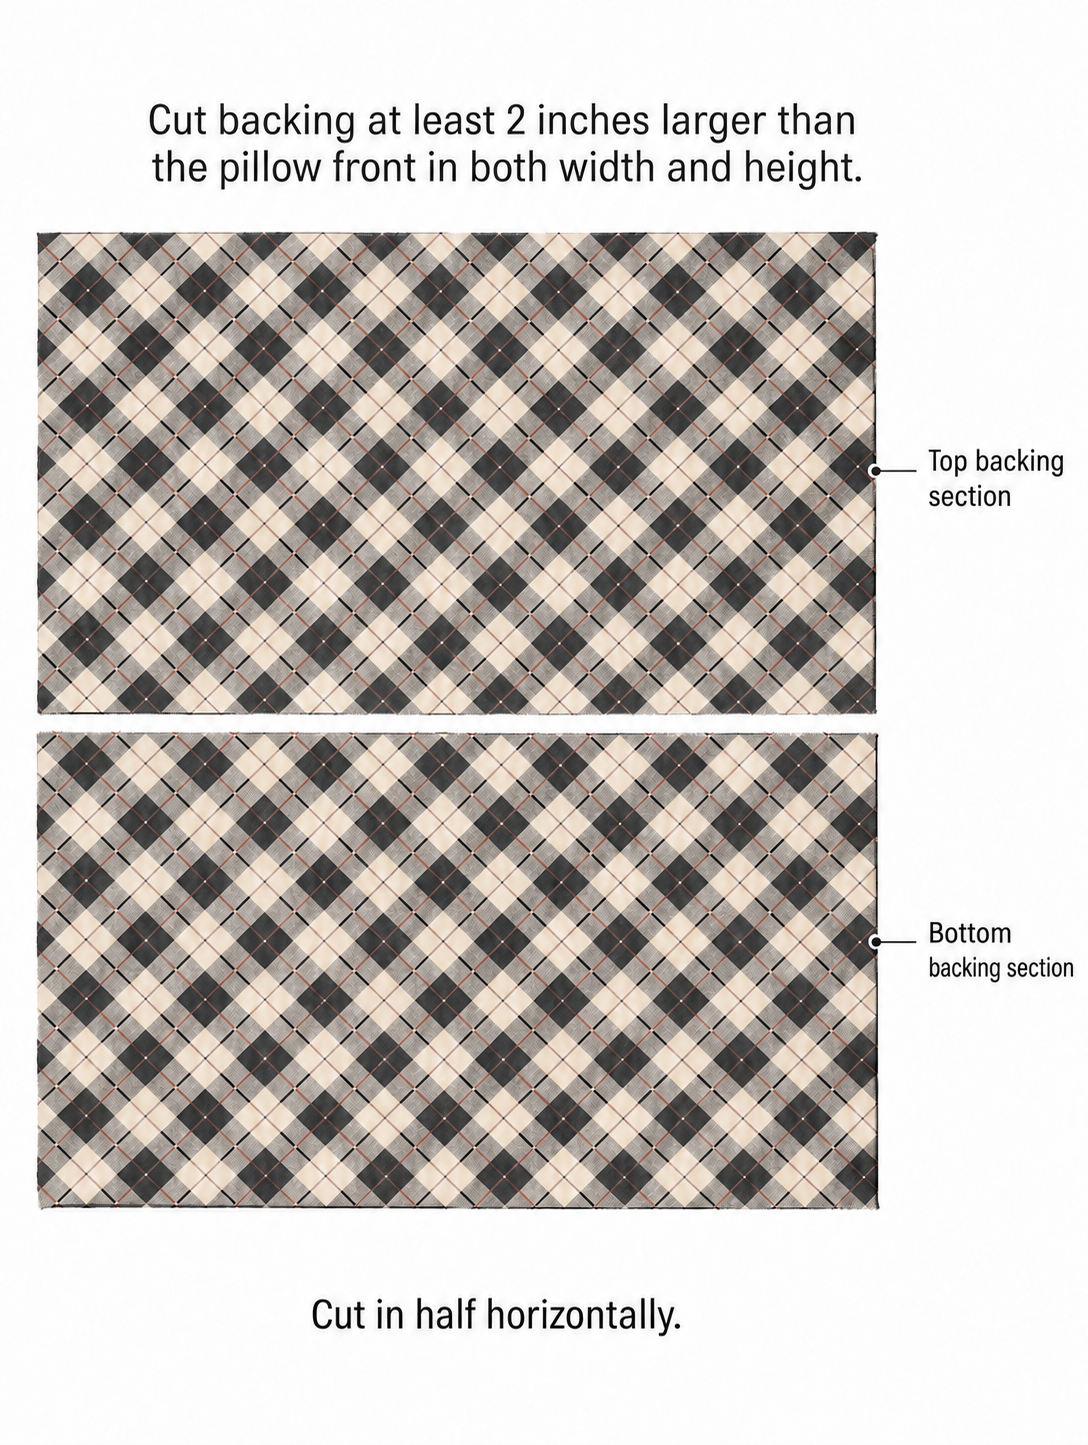
Measure your trimmed pillow front. Cut the backing 2 inches larger in both directions, then cut it in half horizontally to make a top and bottom section.
The extra fabric gives you room to work. You’ll trim the assembled back to match the pillow front before sewing the cover together.
Step 2: Press the Flap
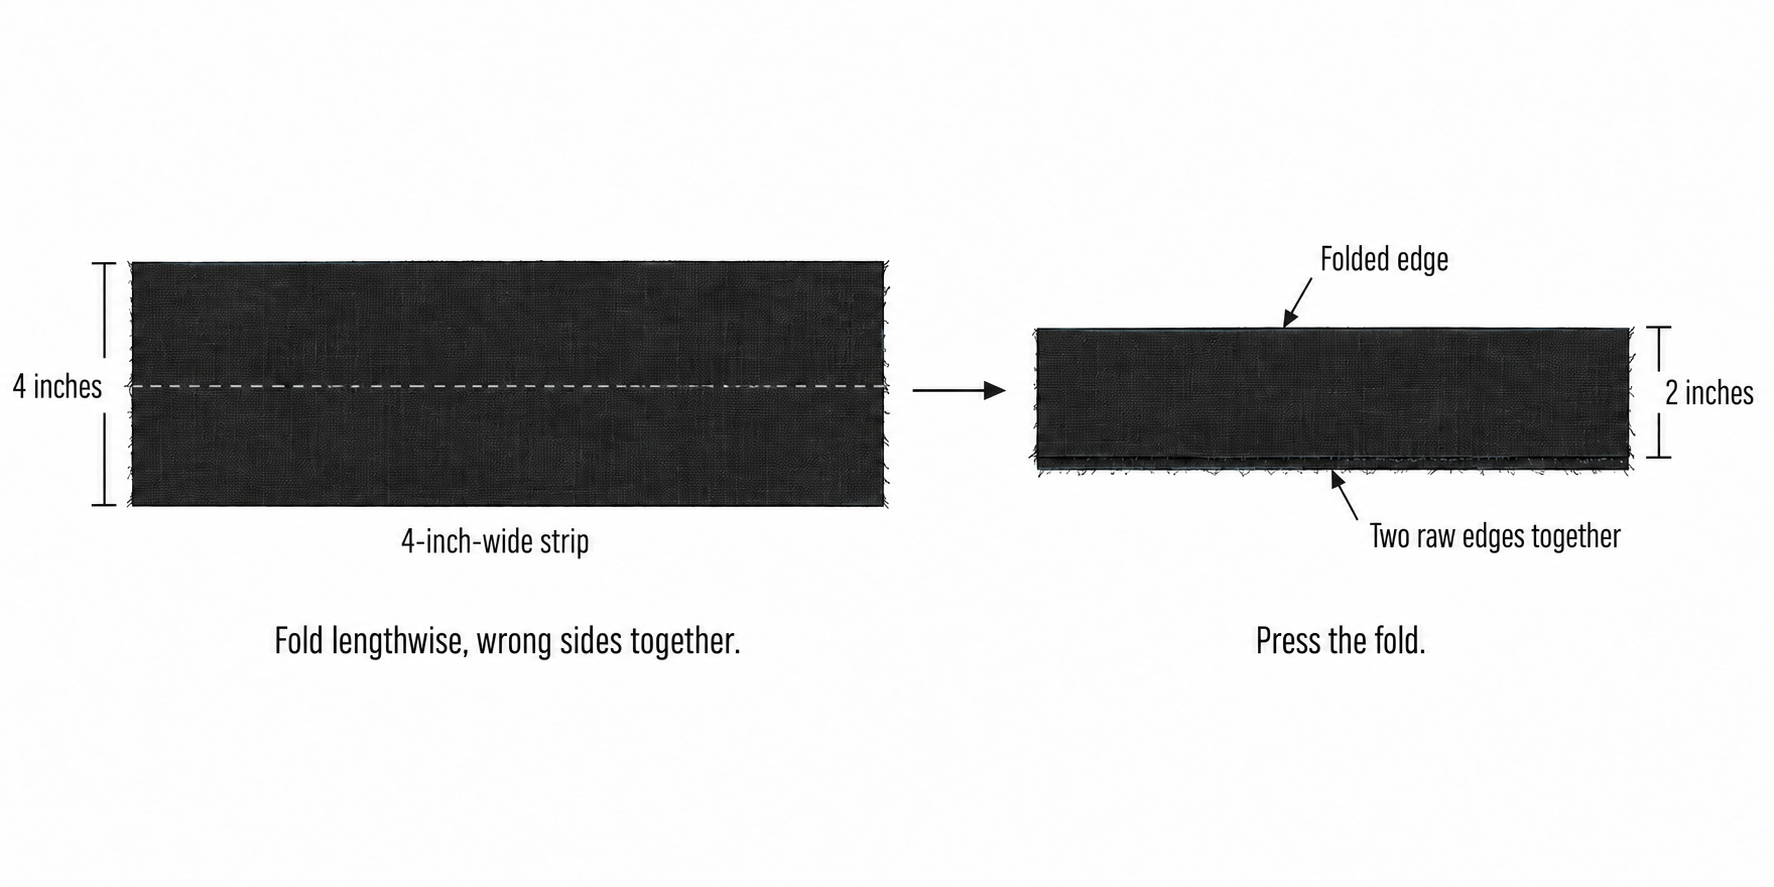
Fold the 4-inch strip lengthwise, wrong sides together, and press. The folded flap is 2 inches wide.
Step 3: Position the Flap and Zipper
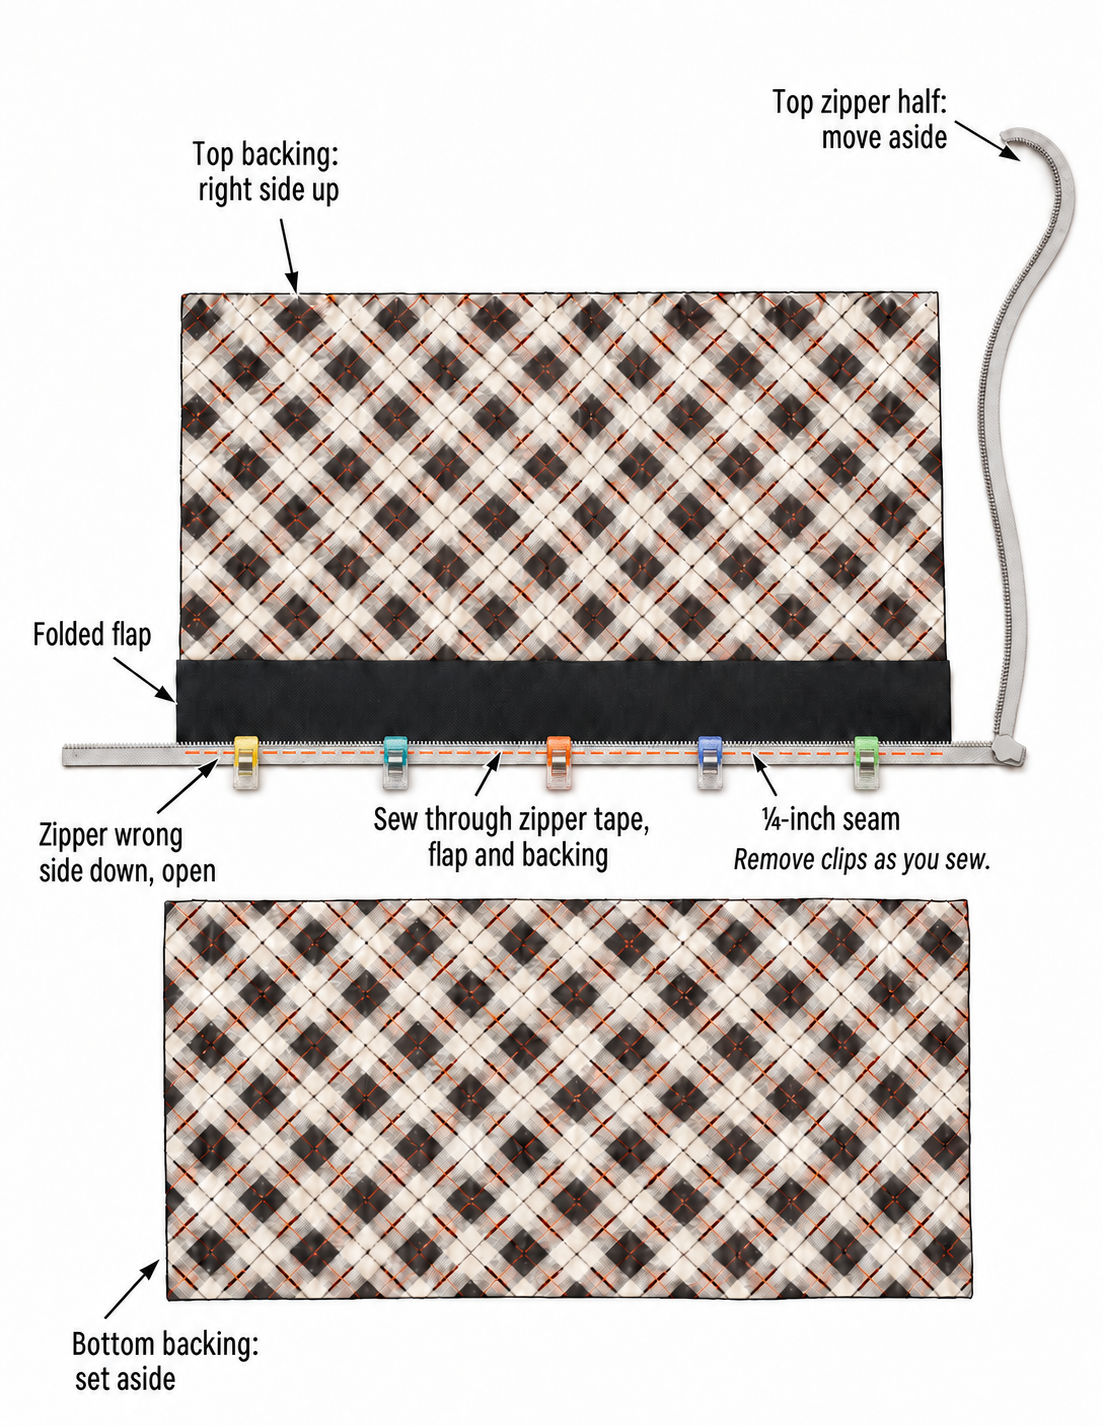
Lay the top backing section right side up. Place the folded flap along its lower edge, matching the flap’s raw edges to the backing's raw edge. The fold points toward the top of the panel. Place the zipper wrong side down, open, and place it on the panel, as shown in the drawing. Align the bottom zipper tape with the matched raw edges, with the teeth pointing toward the top of the flap. Move the loose top half of the zipper off to the side, and let the extra zipper length extend beyond the sides of the backing.
Clip the backing, flap, and zipper tape together, keeping the bottom edge even.
Step 4: Sew the First Side
Using a zipper foot, sew along the clipped edge with a ¼-inch seam allowance. Remove the clips as you sew.
Fold the flap down and press the seam so the flap will cover the zipper. Keep the fabric smooth and clear of the zipper teeth. Topstitch on the backing ⅛ inch from the flap seam, as shown in the video.
Step 5: Attach the Bottom Backing Section
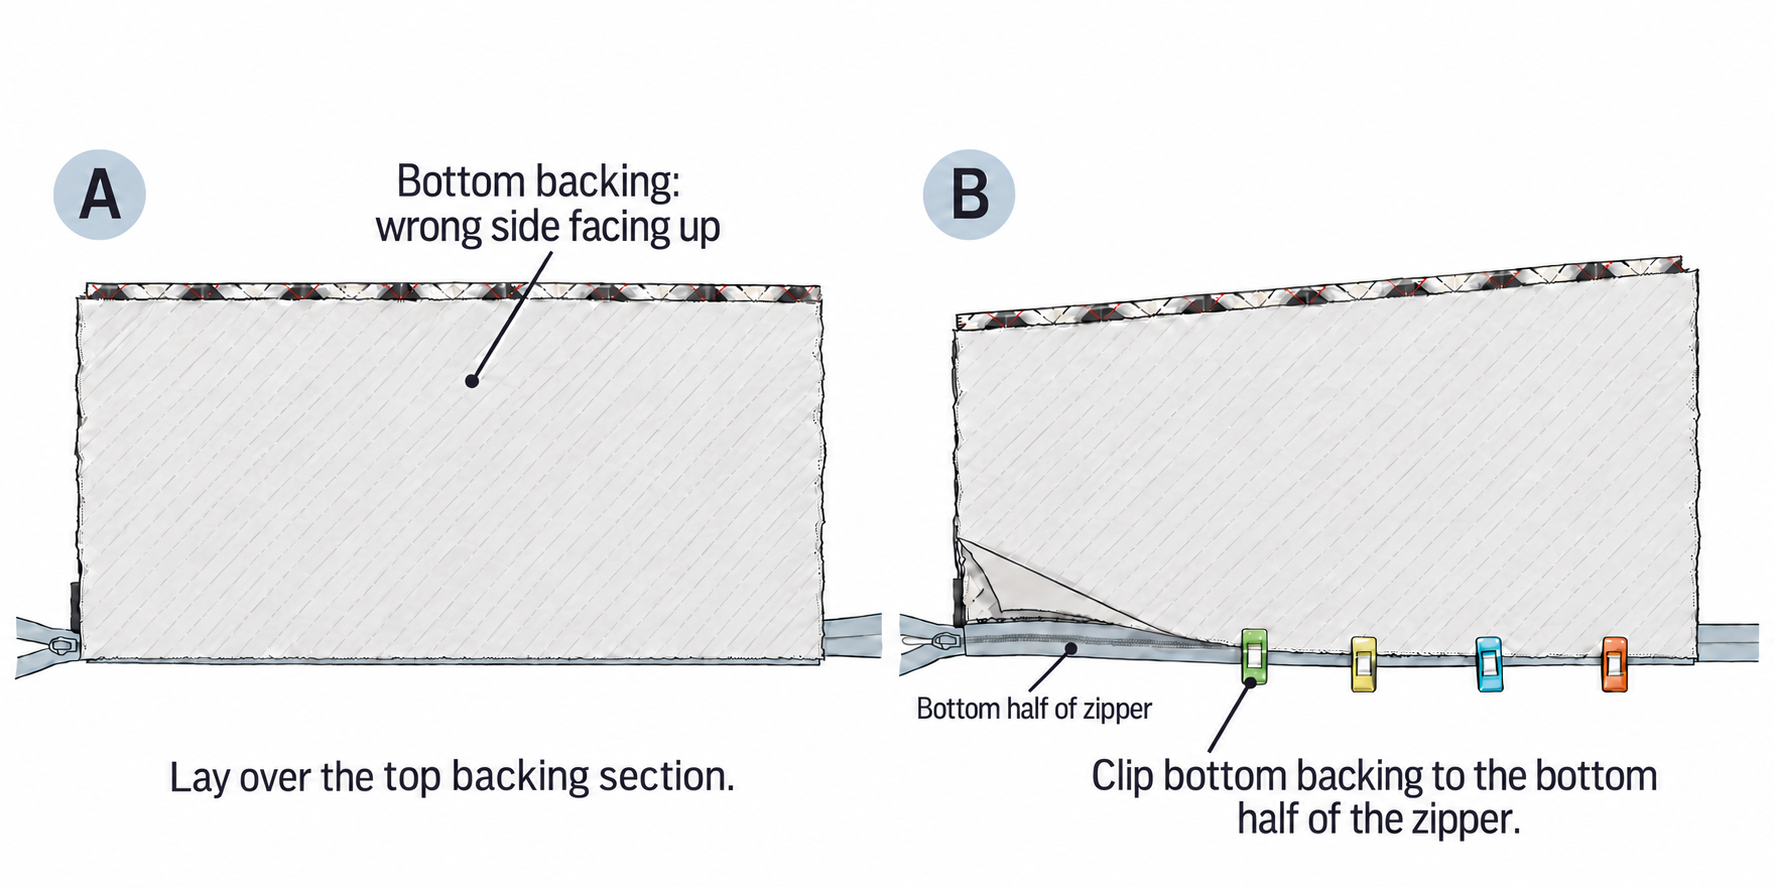
Position the bottom backing section over the top section, with its wrong side facing up. Close the zipper, align its joining edge with the remaining zipper tape as shown in the video, and clip the layers in place.
With the layers clipped in position, open the zipper and use a zipper foot to sew the remaining zipper tape to the bottom backing section, removing the clips as you sew and keeping the teeth clear of the needle. Fold the bottom section down into place, and press the backing flat. Topstitch on the bottom backing section ⅛ inch from its zipper seam. Close the zipper, then open 1/3 the way.
Step 6: Layer and Trim
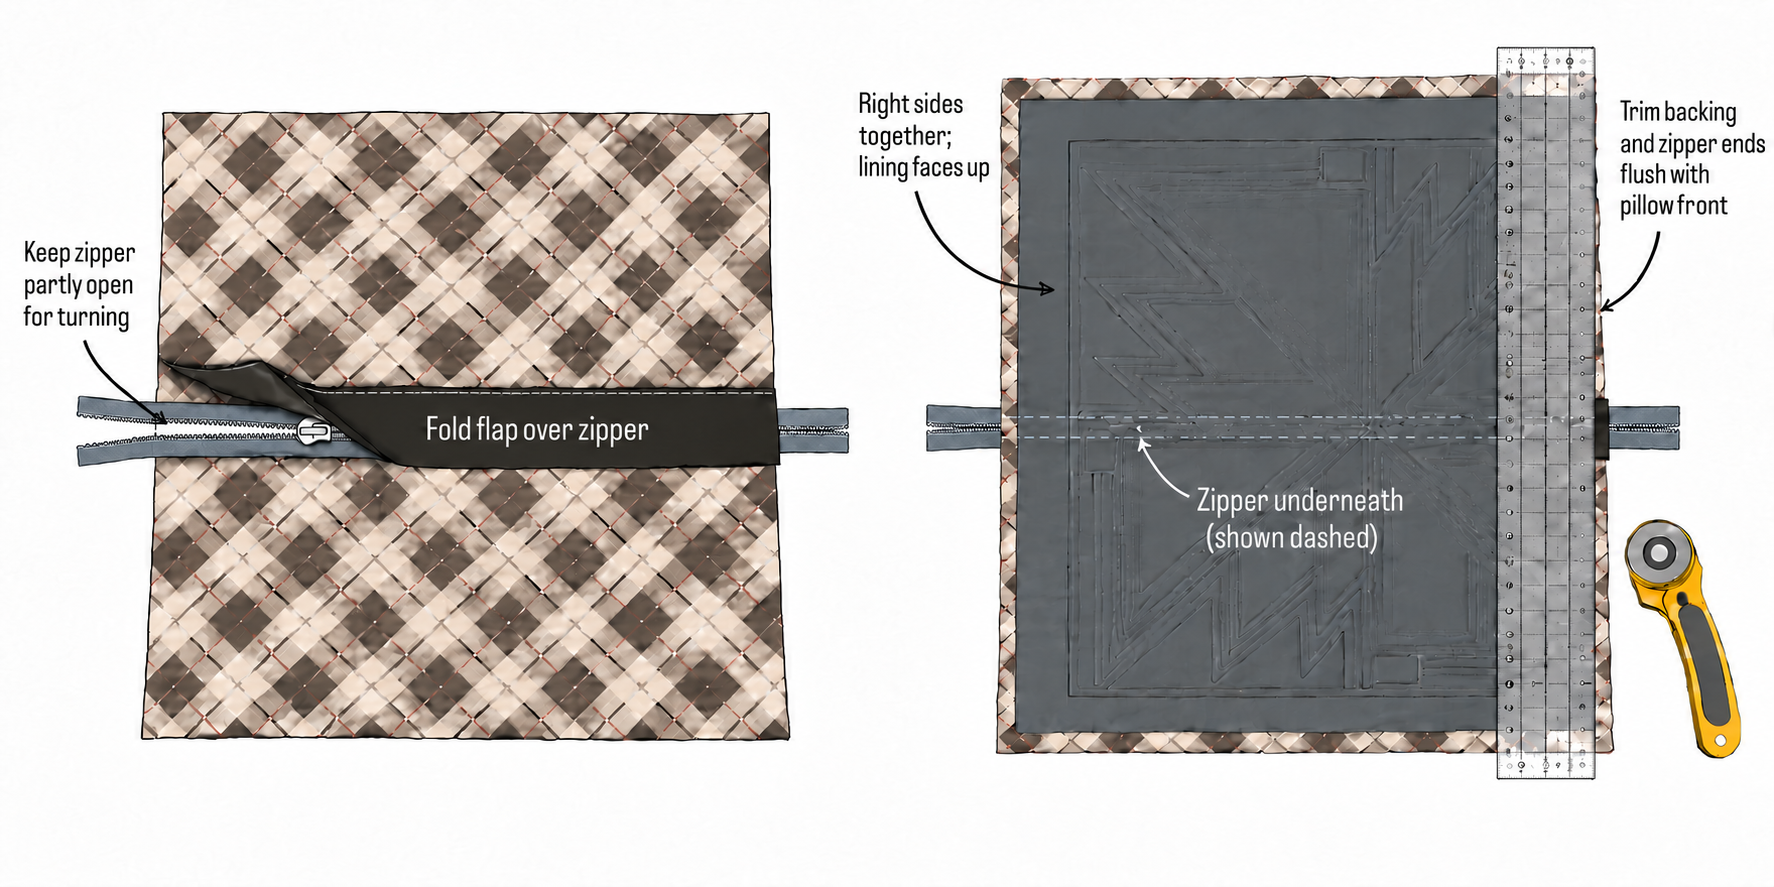
Lay the assembled backing right side up, with the flap lying flat over the zipper. Place the pillow front on top, with the right sides together.
Before trimming, make sure the zipper pull is inside the pillow’s side edges so it stays on the cover. Leave the zipper open enough to turn the pillow right side out later.
Trim the backing and excess zipper ends to match the pillow front. Clip the layers together, securing the flap and zipper ends at the sides.
Step 7: Sew and Turn
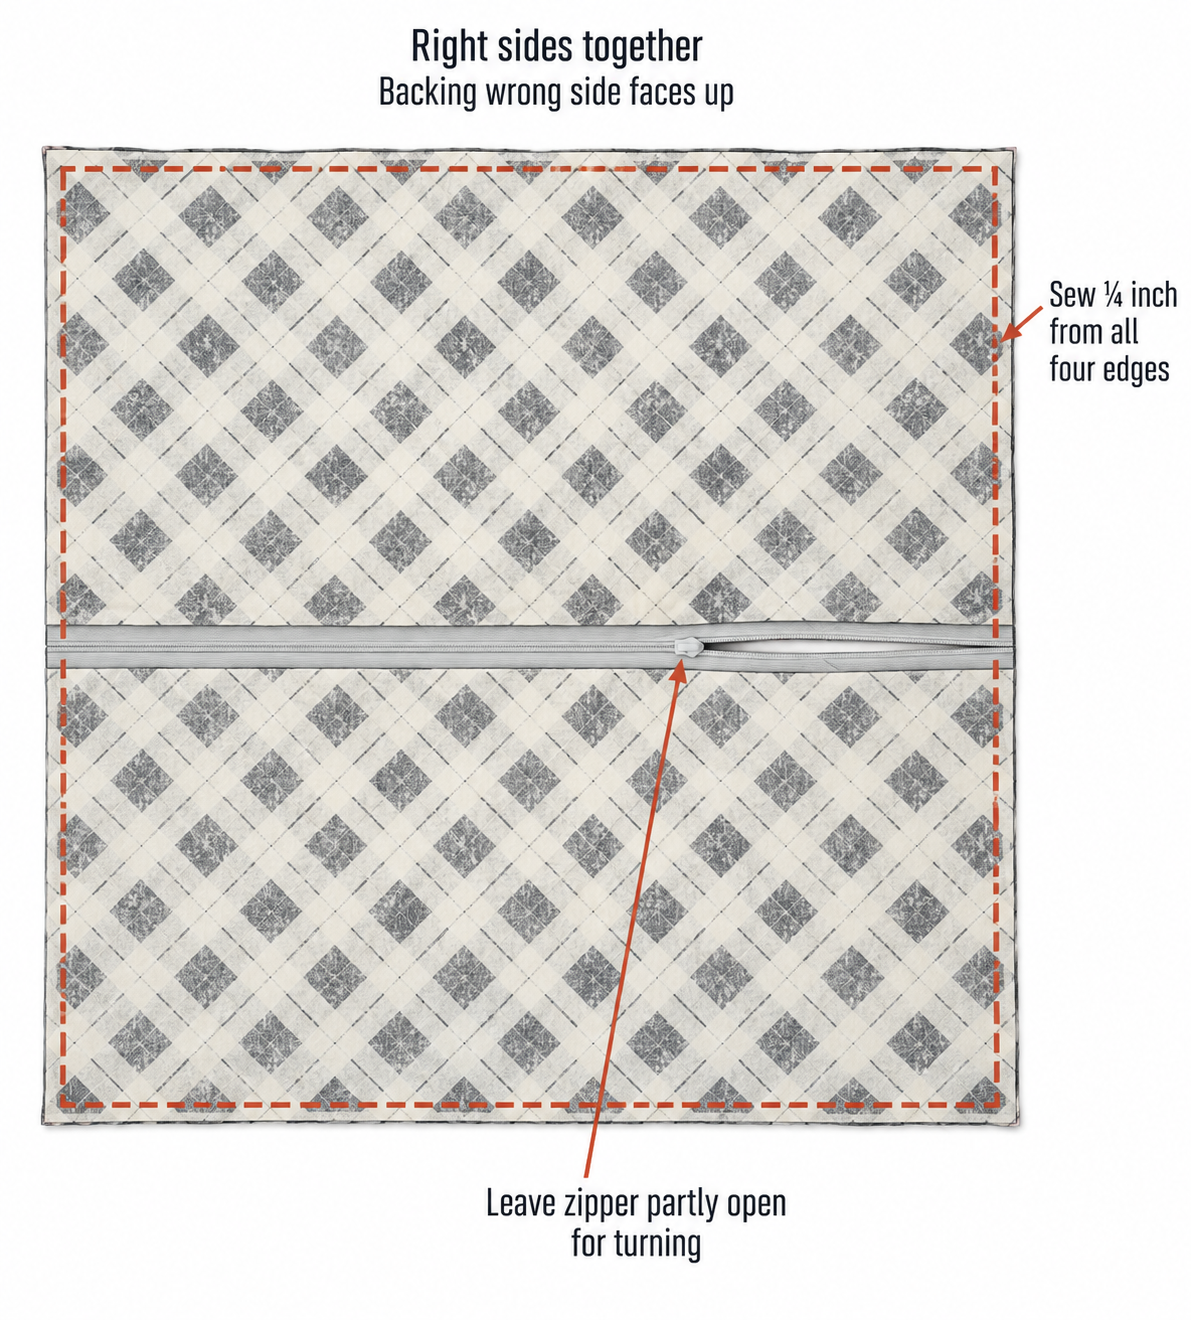
Sew around all four sides of the pillow with a ¼-inch seam allowance. You don't need a turning gap in the perimeter seam because you’ll turn the cover through the open zipper. Sew slowly as you cross the zipper, and avoid sewing over a metal stop.
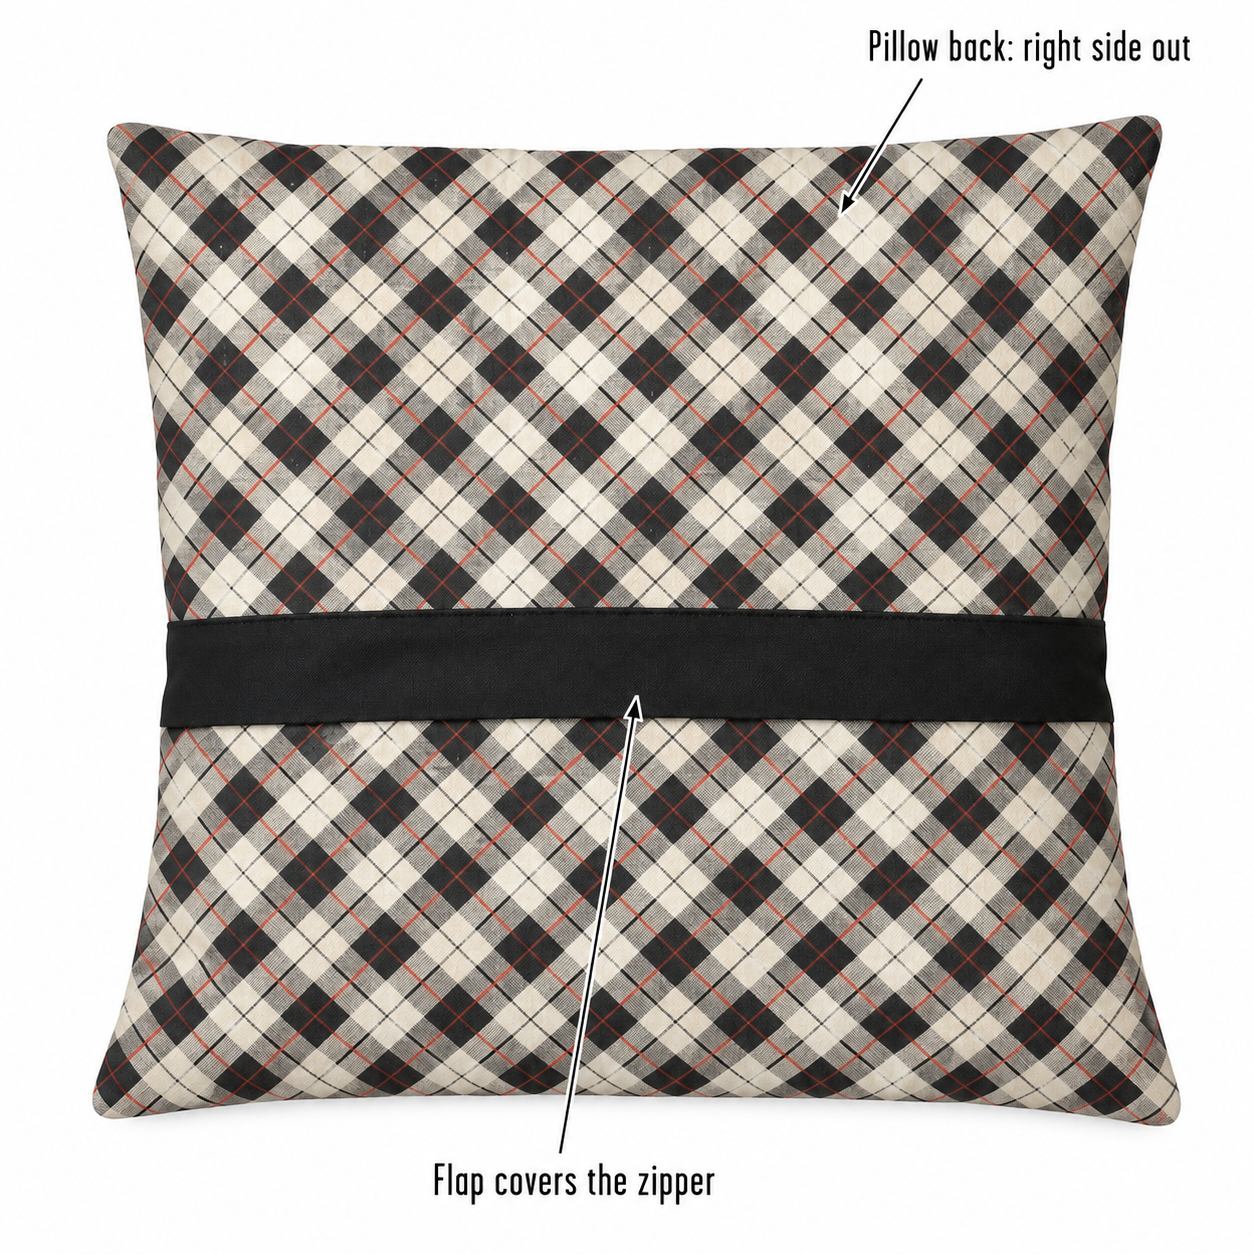
Turn the pillow cover right side out, shape the corners, and insert the pillow form. Smooth the flap over the zipper.
A Few Helpful Tips
Use a zipper longer than the backing width so the pull can stay out of the way while you attach it.
Check your fabric’s direction before cutting and assembling the two backing sections.
Press as you go, keeping the iron away from plastic zipper teeth.
Keep the flap flat when you layer the pillow front and back so its ends are caught neatly in the side seams.
Move the zipper pull inside the pillow edges before trimming, and leave the zipper partly open for turning.