
Why On-Point Changes the Look (and Why I Chose It for Enlace)
What Does “On-Point” Mean in Quilting?
In a traditional quilt layout, blocks are set square—edges parallel to the quilt's edges. In an on-point quilt, those same blocks are rotated 45° so they sit like diamonds instead of squares.
The block construction doesn’t change. What changes is how the blocks are set and how the quilt's edges are finished.
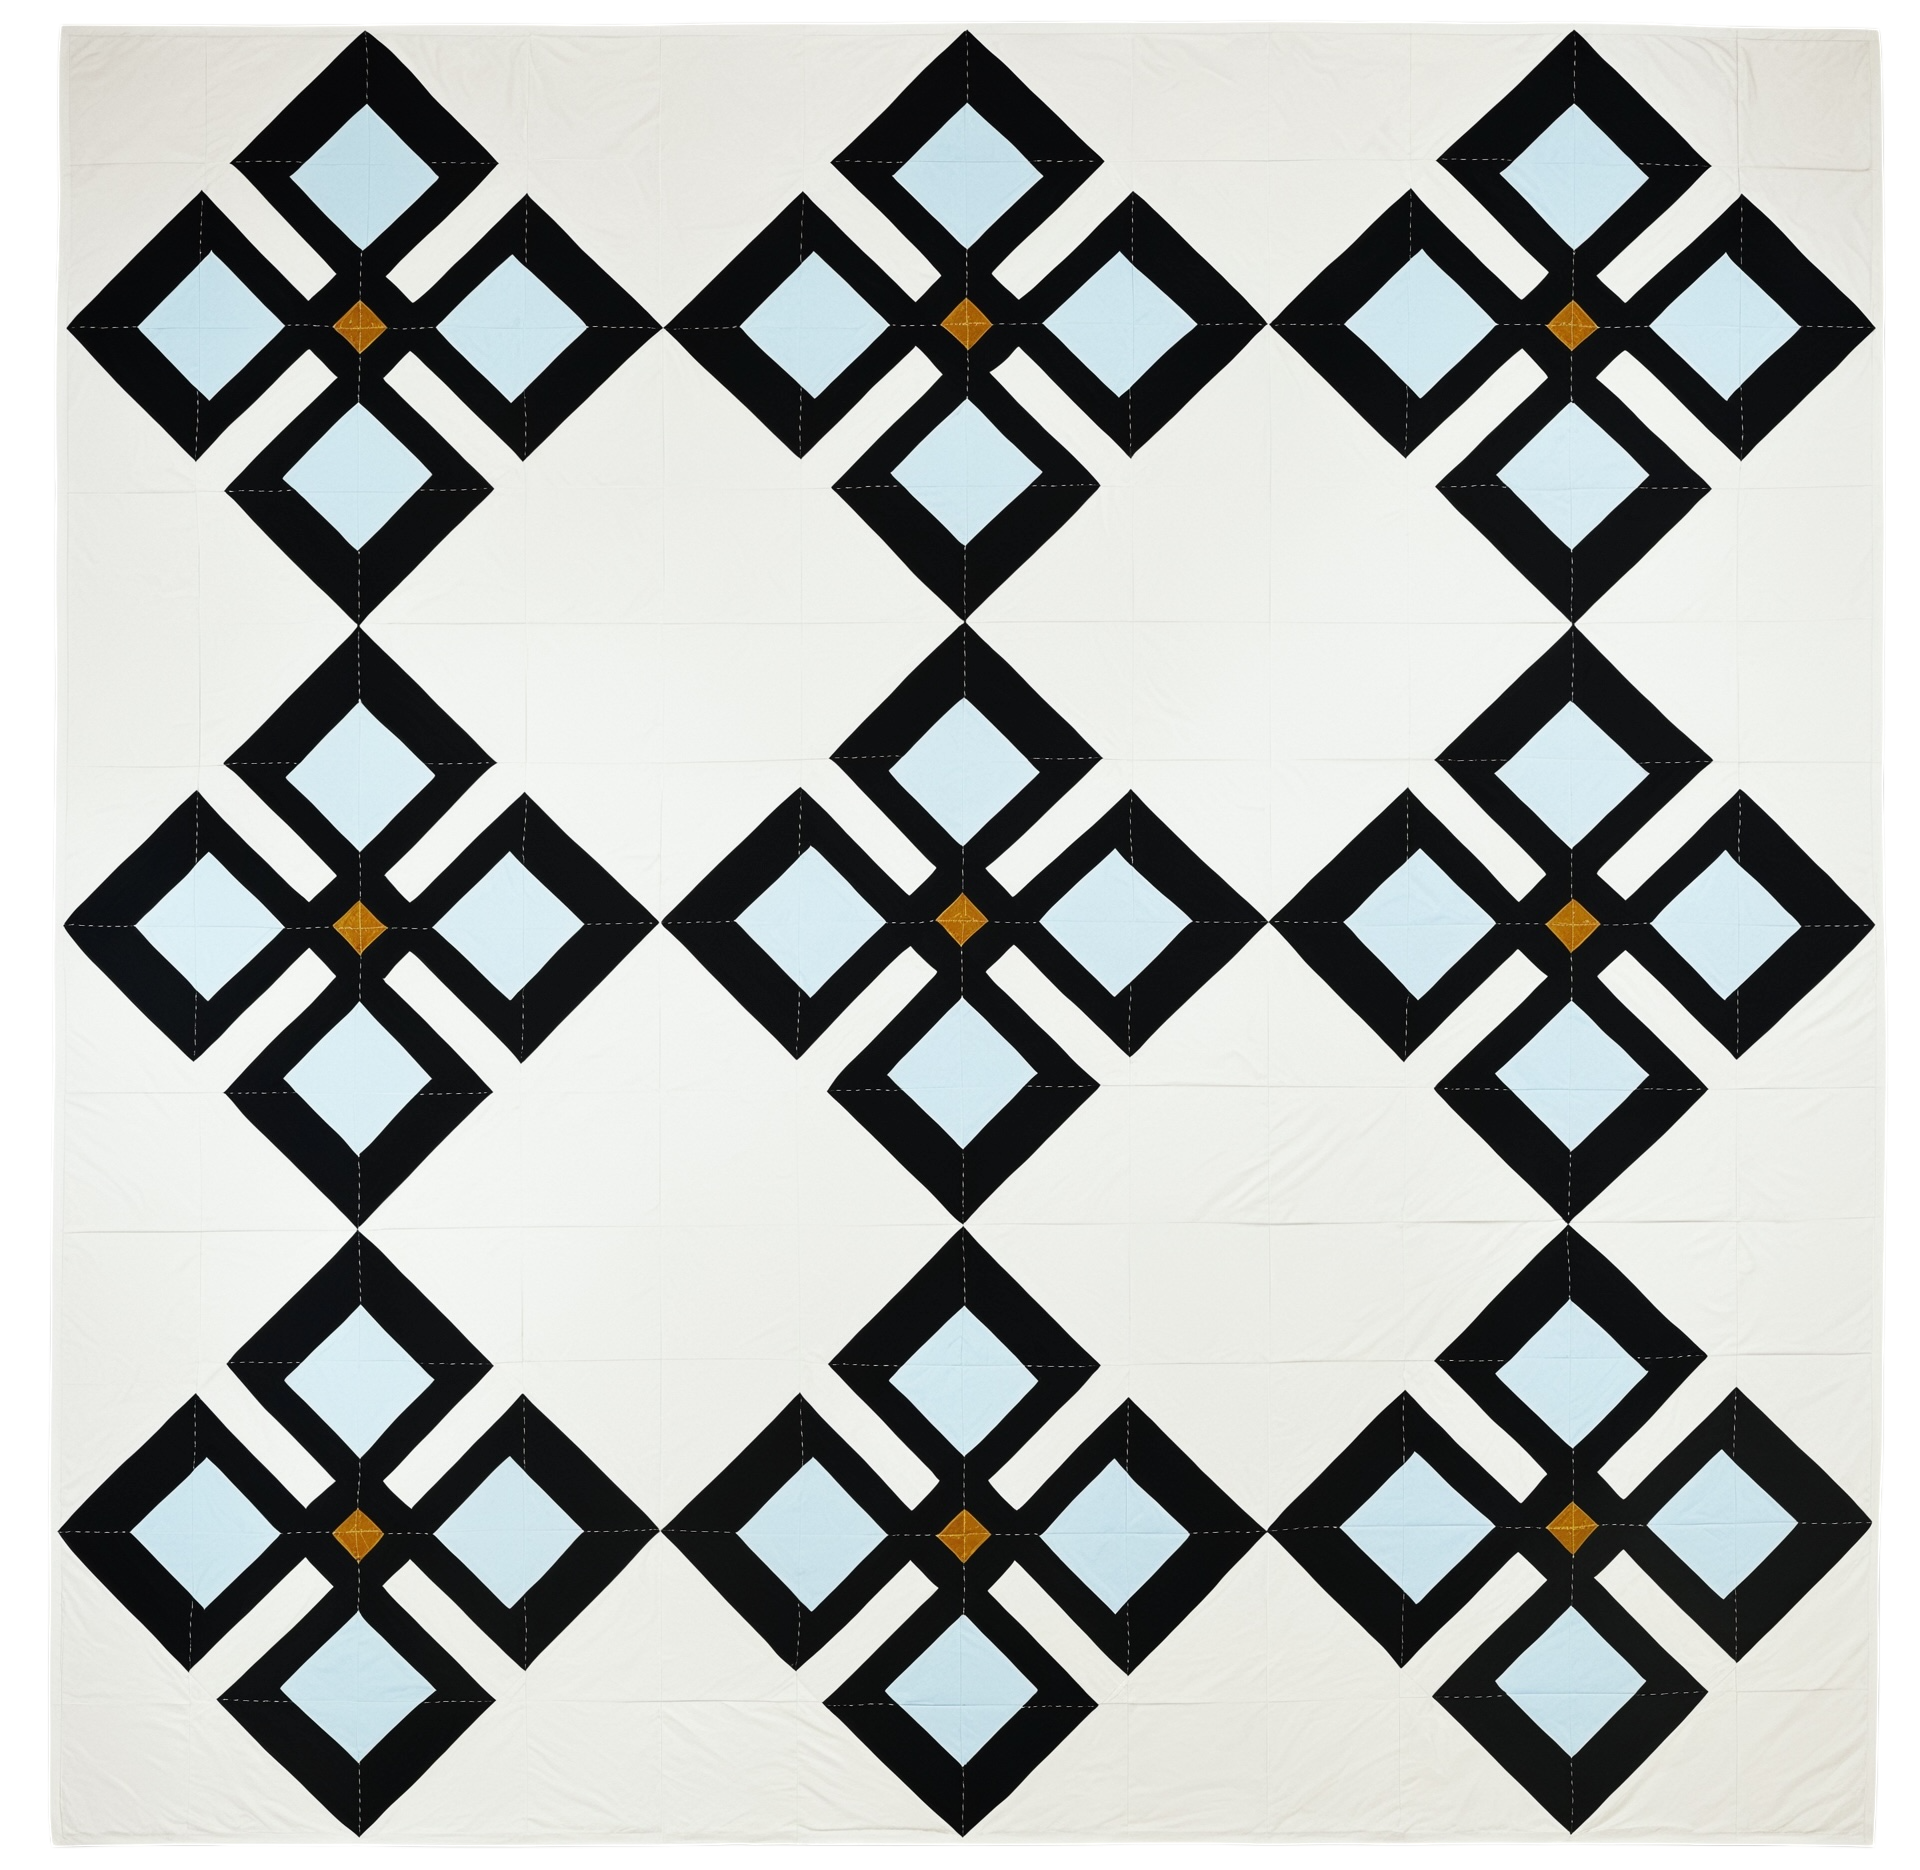
Setting the blocks on point adds movement and helps the design flow, while the open background keeps the quilt feeling calm and modern.
One of the things I love most about on-point quilts is how much they change the feel of a block without changing the block itself. When a block is set straight, it naturally feels more structured and grid-like. That’s not a bad thing at all. But turning that same block on point shifts everything. The diagonal layout adds movement and changes how your eye travels across the quilt, making the design feel more fluid and connected.

Same block, different feel. Straight, the block feels structured and grid-like. Turned on point, it gains movement and a softer, more modern look—without changing the block itself.
That’s why Enlace is an on-point quilt. Turning the simple geometric block on the diagonal softens the whole design and keeps it from feeling blocky or rigid. The block's design can stand on its own, while the negative space gives everything a little room to breathe. The quilt still feels modern and graphic, but calmer and more settled. It’s the same block, but setting it on point completely changes the mood—and that quiet shift is exactly what I love about this layout.
Why Choose an On-Point Layout?
There are a few reasons quilters love on-point designs:
Instant movement – The diagonal layout creates flow and visual interest.
A modern feel – Even classic blocks feel fresh when set on point.
More negative space options – Great for minimalist and contemporary designs.
Design flexibility – Small blocks can feel larger and more dramatic.
The layout does a lot of the design work for you.
The Key Pieces: Setting Triangles & Corner Triangles
This is where most of the mystery (and fear) comes from—but it’s not as bad as it sounds.
Setting Triangles
These triangles fill in the spaces between the on-point blocks on the quilt. They’re cut from squares, then cut on the diagonal.

Cut the square diagonally in both directions to create four side setting triangles. Cutting the square along both diagonals produces four side-setting triangles, with the bias edges positioned toward the quilt's interior. Keeping the bias edges inside the quilt top helps maintain straight outer edges, reduces stretching during piecing, and improves accuracy when squaring up the finished top.
Corner Triangles
These go in the four corners of the quilt to square everything up.

Cut the square diagonally once to create two corner triangles. The long diagonal edge is on the bias and sewn to the quilt's interior blocks. The remaining two edges are straight-grain and form the outer edges of the quilt top, which helps maintain stability and accuracy when assembling and squaring up the quilt.
Piecing an On-Point Quilt (Step by Step)
Piece your blocks first
Treat them like any other quilt block—square them up and keep sizes consistent. A plain fabric square the block’s size counts as a block, as shown below.
Lay out the quilt on the diagonal
This helps you visualize placement before sewing.
Sew diagonal rows together
Sew the diagonal rows (on-point layout)
Working one diagonal row at a time, begin on the left side of the quilt.
Sew a side-setting triangle or corner triangle to the first block in the row.
Add the next block(s), then sew on another side-setting triangle or corner triangle to complete that row.
Add the remaining corner triangles.
Continue sewing diagonal rows from left to right until all rows are assembled.
Tip: After sewing each diagonal row, place it back on the design wall in its original position. This helps keep the layout organized and makes it easier to sew the rows together in the correct order.
Sew Diagonal Rows together.
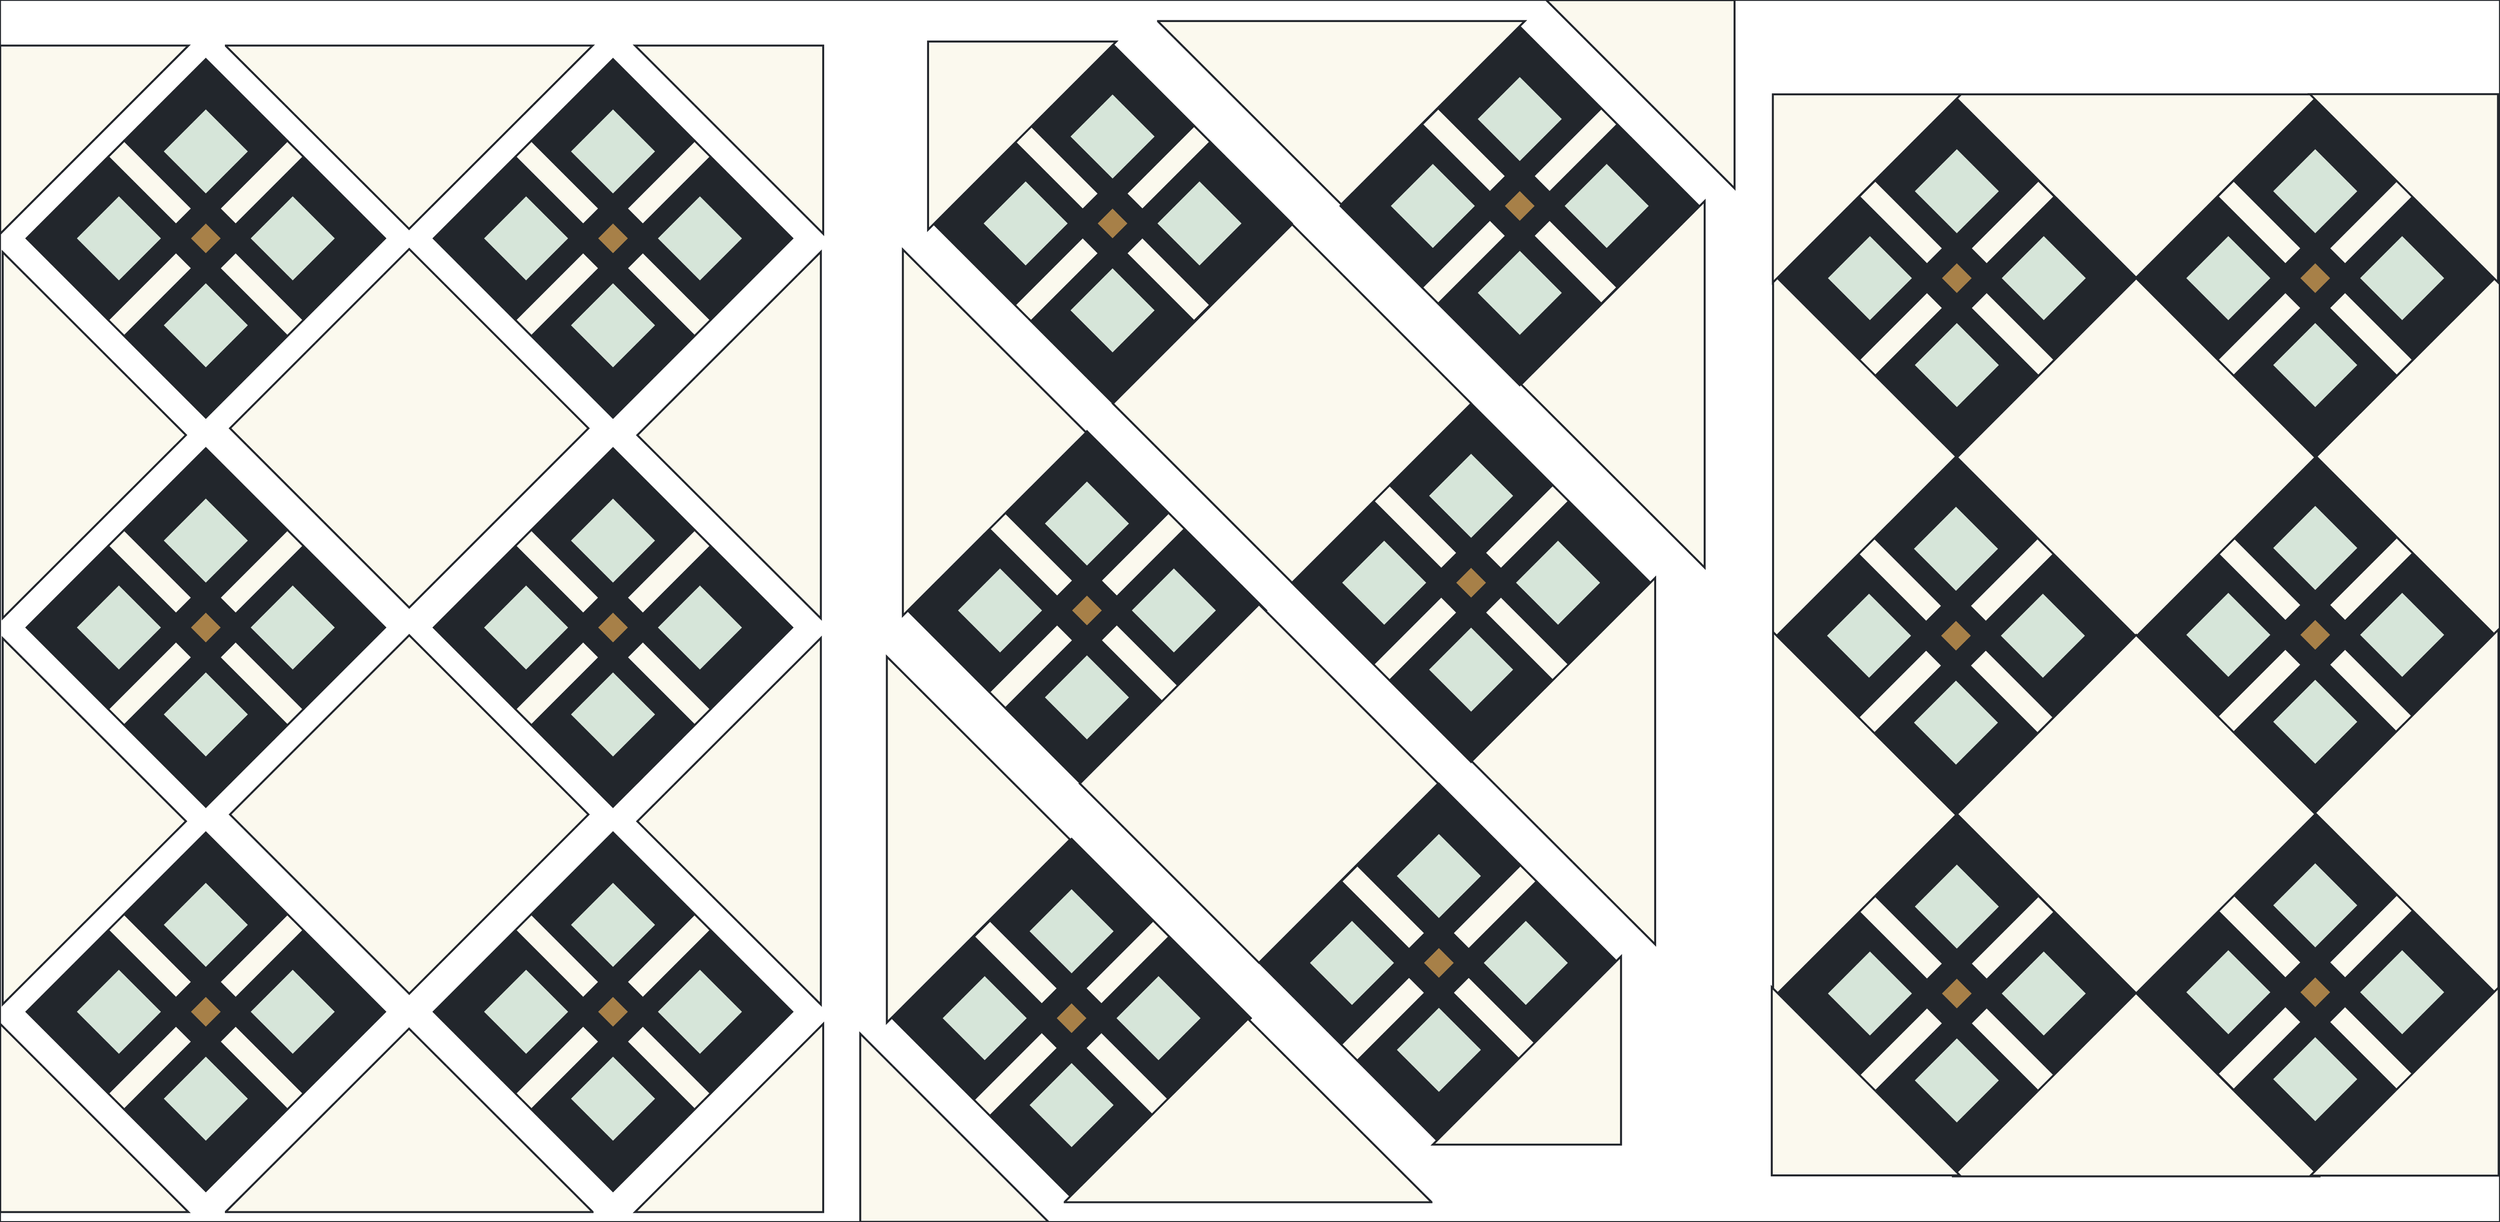
Laying everything out first makes it easier to see the diagonal rows and keeps the on-point layout organized before and while sewing.
On-point quilts may look complex, but once you understand the layout, they’re much easier than you might expect. Taking things one step at a time—and laying everything out before sewing, while continuing to refer to the layout as you sew—makes the process feel manageable and even enjoyable. The Enlace Pattern walks you through each stage with clear, step-by-step instructions, so you can approach an on-point quilt with confidence and end up with a finished quilt you’re proud of.